


Constructing a budget-friendly patio gazebo is achievable by following key steps. Begin with researching local codes and obtaining permits. Choose a suitable location, plan size, and select materials wisely. Anchor posts securely, assemble walls, and add the roof structure. For cost-effectiveness, opt for budget-friendly materials, keep the design simple, and look for deals. Consider using DIY kits or pre-cut materials to save money. Careful planning to minimize waste and expenses is crucial. Implement these steps to create your gazebo while staying within your budget constraints. Mastering these steps will ensure a successful project.
Research Local Building Codes
Before beginning construction on your patio gazebo, make sure to thoroughly research local building codes to ensure compliance with regulations. Understanding the rules regarding posts and roof construction is vital. Local codes may dictate specific requirements for the size and location of your gazebo, as well as the materials allowed for the roof. It’s crucial to verify setback regulations, height restrictions, and property line considerations for the gazebo’s posts.
Additionally, be aware of any restrictions on the roof type and overall design of the gazebo that might be in place. Consulting with local authorities or a building inspector can help clarify any uncertainties you may have about building codes related to your patio gazebo project.
Obtain Necessary Permits
Before you begin constructing your patio gazebo, make sure to reach out to your local permit office to find out if you need any building permits. These permits are crucial as they ensure that your gazebo adheres to safety regulations and local building codes.
Permit Application Process
Wondering how to kickstart the construction of your budget-friendly patio gazebo? Before you begin building one, it’s crucial to navigate the permit application process smoothly. Here’s what you need to do:
- Contact the Local Permit Office: Reach out to your local permit office to obtain the necessary building permits for your gazebo project. This step is essential to ensure that your structure complies with safety standards and regulations.
- Consider Utility Lines: Before digging with a post hole digger, be sure to identify the locations of any utility lines on your property. This precaution will help you avoid damaging utility lines during construction and ensure a safe building process.
- Plan Ahead: Getting the required permits in advance can prevent delays and potential fines down the line. Stay proactive by checking with the permit office to address any concerns and ensure a seamless construction experience.
Compliance With Regulations
To ensure compliance with local regulations and safety standards, it’s imperative to obtain the necessary building permits before starting construction on your patio gazebo.
Building permits are essential to ensure that your gazebo meets safety standards and zoning requirements. Check with your local permit office to understand the specific regulations and requirements for building a gazebo in your area.
Failure to obtain the required permits can result in fines, construction delays, or even having to remove the structure altogether. By obtaining the necessary permits, you demonstrate a commitment to safety and adherence to legal guidelines, giving you peace of mind throughout the building process.
Choose Suitable Location
When selecting a location for your patio gazebo, aim for optimal sunlight exposure to enhance your outdoor experience.
Additionally, ensure the ground is stable enough to support the gazebo structure securely.
Taking these factors into account will create a pleasant and functional space for your enjoyment.
Optimal Sunlight Exposure
Selecting a location with ideal sunlight exposure is crucial when choosing the placement for your patio gazebo. To ensure your outdoor space is comfortable and inviting, follow these tips:
- Balance of Sunlight and Shade: Aim for a spot that receives a good balance of sunlight and shade throughout the day. This will help create a pleasant environment where you can relax without being overheated.
- Consider Sun Angles: Pay attention to how the sun moves across your yard during different times of the day. This will help you determine the best placement for your gazebo’s posts and roof pieces to maximize sunlight exposure.
- Enhance Ambiance: Direct sunlight can provide warmth and natural light, while some shade can offer relief during hot summer days. By strategically placing your patio gazebo, you can enhance the ambiance of your outdoor space and create a welcoming retreat for yourself and your guests.
Consider Ground Stability
For a stable foundation for your patio gazebo, consider the ground stability of the chosen location to ensure long-term durability and safety. When selecting a spot to build a gazebo in your backyard, it’s crucial to choose an area with stable ground to prevent any shifting or sinking of the structure over time.
Factors such as drainage, soil composition, and slope should be taken into account to ensure the gazebo’s stability. Avoid placing the gazebo in areas prone to flooding or erosion, as this could compromise its long-term durability. Opt for a location with level ground, as this is essential for creating a sturdy and secure foundation for your backyard gazebo.
Properly preparing the ground before installation can help prevent future issues with stability and ensure the structural integrity of your patio gazebo for years to come.
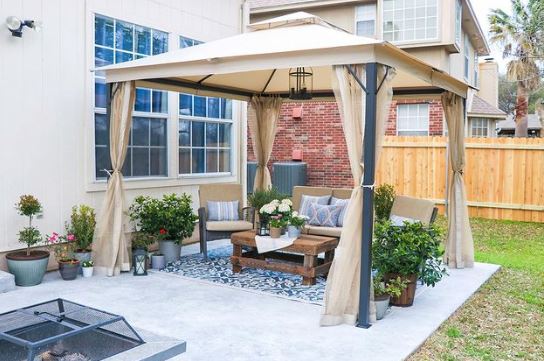
Plan Size and Shape
Opt for an 8×8 ft square gazebo for a budget-friendly option, making it easier to build and more cost-effective.
When planning the size and shape of your patio gazebo, it’s essential to think about both practicality and aesthetics. Here are some tips to help you decide:
- Consider the available space: Ensure the gazebo fits comfortably in your yard without overwhelming the area.
- Think about the intended use: If you plan to use the gazebo for dining or entertaining, a larger size may be more suitable.
- Choose a shape wisely: While a square or rectangular gazebo is simpler and more budget-friendly, a hexagonal or octagonal shape can add a unique touch but may require more materials and labor.
Select Materials Wisely
When choosing materials for your patio gazebo, prioritize durability and weather-resistance to ensure longevity. Opt for pressure-treated wood or cedar for a sturdy structure that can withstand the elements over time. These materials are known for their ability to resist rot, insects, and decay, making them ideal for outdoor use.
If you’re looking for a more budget-friendly option, consider materials like aluminum or vinyl which aren’t only cost-effective but also require minimal maintenance.
When selecting materials, also keep in mind the convenience of prefabricated gazebo kits. These kits often come pre-cut, making assembly easier and saving you both time and money on construction.
Additionally, be on the lookout for sales, discounts, or clearance items at local home improvement stores to further reduce material costs without compromising quality. By comparing prices and quality of different materials, you can find the best balance between your budget and the durability you need for your patio gazebo.
Opt for DIY Kits or Recycled Materials
Opt for DIY kits or recycled materials to create a budget-friendly patio gazebo with a personal touch. Choosing these options not only saves you money but also allows for customization and environmental benefits.
Here’s why you should consider these choices:
- Cost-Effective Gazebo Kits: DIY patio gazebo kits can be found for as low as $500, providing an affordable starting point for your project.
- Reduce, Reuse, Recycle: Utilizing recycled materials such as old wood or metal can further cut down costs while giving your gazebo a unique look.
- All-Inclusive Assembly: DIY gazebo kits typically come with all the necessary parts for assembly, minimizing the need for additional purchases.
Prepare the Area
Clear the designated area of any debris, rocks, or vegetation to ensure a smooth foundation for your gazebo.
Use a tape measure to mark out the correct dimensions, making sure it fits the available space.
Remember to check for underground utilities or cables before digging post holes to avoid any complications during construction.
Clearing the Space
How can you ensure a level and obstruction-free area for placing your budget-friendly patio gazebo? To prepare the space effectively, follow these steps:
- Measure and Mark Out:
Begin by measuring and marking the exact location where the gazebo will be placed. Use this as a guide to ensure the area is level and free of any obstructions like rocks or debris.
- Clear Debris:
Remove any rocks, plants, or other debris from the marked area to create a clean and flat surface for the gazebo base. This will help in setting up the post holes and bracing beams securely.
- Consider Professional Help:
If the area has large obstacles or uneven ground, consider hiring a professional to clear the space. They can ensure proper leveling and removal of any challenging obstructions.
Leveling the Ground
To ensure a stable and even base for your budget-friendly patio gazebo, leveling the ground is crucial. Using a leveling tool, check for any slopes or uneven areas in the designated spot. This step is essential to prevent any issues with the gazebo’s stability and longevity.
Clear the area of any debris or obstacles to create a clean and smooth surface for construction. Take the time to compact the soil or consider adding gravel to establish a solid foundation for your gazebo.
By leveling the ground properly, you’ll create a more secure and durable base for your outdoor structure. Remember that a well-leveled ground not only enhances the aesthetics of your patio gazebo but also ensures its structural integrity.
Investing time in this foundational step will lead to a more successful and long-lasting outdoor space for you to enjoy.
Checking for Utilities
Make sure to thoroughly check for underground utilities before commencing construction on your patio gazebo to prevent any potential hazards or disruptions.
Before breaking ground for your post holes, take the necessary steps to ensure a safe building environment:
- Contact local utility companies or utilize online services to mark the locations of gas, water, and electrical lines.
- Failure to locate and mark utilities can lead to costly repairs, injuries, or service disruptions.
- It’s essential to ensure that the construction area is clear of any obstructions or hazards to facilitate a smooth and safe building process.
Build the Base
Begin by cutting wood pieces for the base structure using 2×4 joists for support. Start by digging post holes in your outdoor space where you plan to place the gazebo. Once the holes are set, cut the 2×4 joists to the appropriate length and attach them around the posts. Ensure the base is level and securely fastened to the posts to provide stability for the gazebo structure.
Next, use cedar boards to create the floor of the gazebo, similar to building a basic deck. Make sure the boards are evenly spaced and securely attached to the joists.
The base construction is crucial for the overall stability and durability of your patio gazebo. By following these steps and paying attention to detail during the base building process, you’ll lay a solid foundation for the rest of your gazebo construction project.
Anchor Posts Securely
Ensure the stability and durability of your patio gazebo by securely anchoring the 4×6 posts at least 2 feet deep in the ground, filling post holes with gravel for drainage before adding concrete. This will provide a strong foundation for your gazebo structure.
Here are some essential steps to anchor your posts securely:
- Digging the Right Depth: Dig the post holes to a depth of at least 2 feet to ensure proper anchoring and stability.
- Gravel for Drainage: Fill the bottom of the post holes with gravel to aid in drainage and prevent water accumulation around the posts.
- Securing with Large Bolts: Use large bolts to secure the posts firmly in place, minimizing the risk of shifting or leaning over time.
Assemble Walls
To assemble the walls for your patio gazebo, follow the provided instructions for connecting pre-cut pieces securely using screws or nails. Begin by positioning the pieces perpendicular to the posts, ensuring they fit together seamlessly.
Working methodically, attach the walls in the designated order of assembly to maintain alignment and structural integrity. Use a level to check that the walls are straight and plumb, making adjustments as needed for a professional finish.
When securing the pieces together, opt for screws or nails that are suitable for outdoor use and will provide stability. Ensure each connection point is firmly fastened to prevent any shifting or wobbling once the gazebo is complete.
Taking the time to assemble the walls accurately will contribute to the overall strength and durability of your patio gazebo. Remember, precision in this step will make the rest of the construction process smoother and more successful.
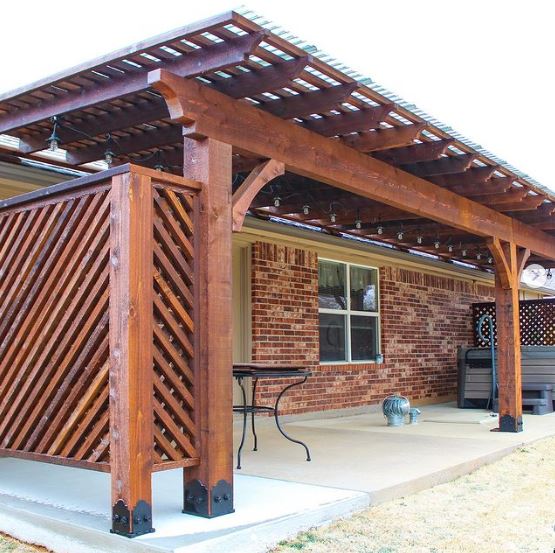
Add Roof Structure
When adding the roof structure to your patio gazebo, focus on incorporating beams, rafters, and a suitable covering material for long-lasting support and protection.
To ensure a sturdy and durable roof for your gazebo, follow these key steps:
- Install Roof Beams: Begin by positioning the roof beams on top of the walls, ensuring they’re securely attached to provide the necessary support for the roof structure.
- Secure Rafters: Connect the rafters to the beams at the desired slope to form the framework that will support the roof covering and contribute to the gazebo’s overall stability.
- Choose the Right Covering Material: Select a suitable roof covering material such as shingles, metal panels, or canvas based on factors like aesthetics, durability, and weather resistance to protect your gazebo from the elements effectively.
Remember to dig proper post holes to secure the beams and rafters firmly in place, ensuring the roof structure can withstand various environmental conditions for years to come.
Stay Within Budget Constraints
Consider cost-effective strategies to stay within budget constraints while building your patio gazebo. To start, opt for materials like pressure-treated wood or metal for the gazebo structure, as these are durable yet budget-friendly options.
Keep the design simple with minimal decorative elements to reduce construction costs. When it comes to the roof, shop around for deals on materials such as corrugated metal or asphalt shingles to stay within your budget limits.
For the assembly process, consider using DIY kits or pre-cut materials to save on labor costs. Additionally, plan the size of the gazebo carefully to minimize material waste and keep expenses down.
Remember, using a post hole digger can help you secure the gazebo’s foundation efficiently, saving time and money. Lastly, consider opting for an angled roof design, which can be easier and more cost-effective to construct compared to intricate roof styles.
Frequently Asked Questions
Is It Cheaper to Build a Gazebo or Buy One?
Building a gazebo can be cheaper than buying one. DIY kits cost around $1399, eliminate additional expenses like replacing canvas tops, and require minimal maintenance. Assembling a kit can be cost-effective and rewarding for budget-conscious individuals.
How Much Does It Cost to Build a 12X12 Gazebo?
Building a 12×12 gazebo can cost $1,500 to $3,000 based on materials and design. DIY kits start around $1,000, while hiring a pro ranges from $3,000 to $6,000. Adding features like lighting and flooring can increase costs.
Do You Need a Concrete Slab for a Gazebo?
You might not always need a concrete slab for a gazebo. Consider factors like size, weight, and design. Larger or heavier gazebos may benefit from a concrete base for stability. Consult professionals or kit instructions for guidance.
How Long Does It Take to Build a Gazebo From Scratch?
Building a gazebo from scratch typically takes around 50 man-hours, but with four helpers, you can assemble it in about 90 minutes. DIY kits provide all necessary parts. The timeframe varies based on skill level.
Conclusion
In conclusion, building a budget-friendly patio gazebo is a manageable project with the right preparation and planning.
By following the steps outlined in this guide, you can create a beautiful outdoor space without breaking the bank.
So why wait? Start gathering your materials and get ready to enjoy your new gazebo in no time!